New Protect Antarctica Lino Print
I developed my Lino print over the past number of weeks while developing other elements of my project creating different dyes onto fabric which I can develop into inks and pigments for Lino inks and screen printing inks.
The colours I am developing are indigo and woad for my Tote bag for shopping to reduce single use plastics.

Lino cut onto A3 using 3 different tools.

I initially draw onto baking crease proof paper so I can turn it around and trace the opposite onto lino. I have also recognised it is useful to rub the lino with a rubber to remove crease that has got onto lino from its making process or your hands. This makes pencil easier to apply. I also use a really thick soft pencil which works really well.

The large one is used for big areas and the smaller ones for detail.

I have chosen to create a new screen print as the finish that you get from a screen print is more defined and more conformed than using the press and a lino, its also commercially quicker and therefore cheaper to make.

I have developed some more Lino prints using coral and seaweed as inspiration. These have been developed from botanical illustrations which I have sourced through Pinterest research.
I think that the tools I have used and my developing skills have increased the element of detail which previously I found difficult to develop using the cheaper tools.

Tools used for cutting link. Big for large areas is useful as it makes the process quicker.

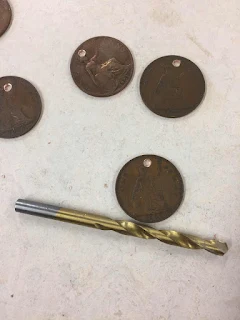
Lino plate initial drawing and the cutting line around it.
Completed Lino cut.
Lino and historical illustrated plate which inspired my Lino cut.
After printing I have realized that the previous lino that I have used the ink rolls onto it easier also the plate after printing it curved and wouldn't lie flat.I could see this as a problem moving forward so I will be using the original lino that I have been using. The actual print design didn't go to plan, the lettering is difficult to read and the seaweed is to close to the feet. I may use this image on illustrator within a collage print.


Colour blending using printing inks Cranfield :California safe wash relief inks,oil based and washable. Prussian blue/Progress blue/Opaque white.
Clam Cross Hatch lino prints in neutral colours using sketch book ideas for reference. Since purchasing new tools for wood cuts/Lino cuts I have discovered how much better the tools are, however for more care is needed as they are extremely sharp.
I would like to put this lino print into Photoshop and create a repeat pattern.


These are the inks colours I used to create these colours mixing with a lot of white. I am hoping to make my own lino inks using an ancient Japanese recipe.
Tools used for cutting link. Big for large areas is useful as it makes the process quicker.
Traditional Lino plate with hessian back.
This Lino plate is harder than the softer Lino that I have been using, I actually really like the colour it’s far more neutral and easier on the eye. It slips a bit more when using tools, however it’s harder so it doesn’t run as far when cutting. I will be printing this plate this week. I traced out my drawing onto plate using inked paper.
Lino plate initial drawing and the cutting line around it.
Completed Lino cut.
Lino and historical illustrated plate which inspired my Lino cut.
After printing I have realized that the previous lino that I have used the ink rolls onto it easier also the plate after printing it curved and wouldn't lie flat.I could see this as a problem moving forward so I will be using the original lino that I have been using. The actual print design didn't go to plan, the lettering is difficult to read and the seaweed is to close to the feet. I may use this image on illustrator within a collage print.
Colour blending using printing inks Cranfield :California safe wash relief inks,oil based and washable. Prussian blue/Progress blue/Opaque white.
I would like to put this lino print into Photoshop and create a repeat pattern.
 |
| Mixing ink with palette Knife. |
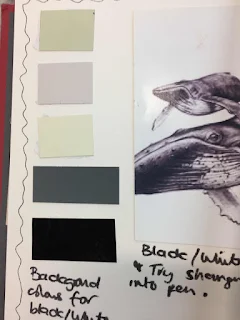 |
| Series of colours for fabric range. |
I will be adding natural pigments to create my colours, hopefully creating similar colours than what I am using now

Petrol tone a great neutral colour even though dark.
The roller size medium soft roller head.
I have added a strip panel in the design, the opposite cut away.
 Mixing the colours took quite a long time I added thinner to this but not too much. After getting the right tone I added a lot more white.
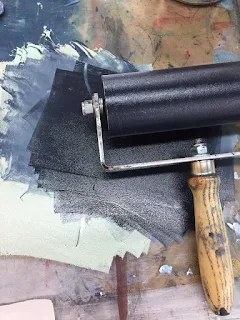 |
| Medium soft roller. |
 |
| Duck Egg Green |
Petrol tone a great neutral colour even though dark.
The roller size medium soft roller head.
I have added a strip panel in the design, the opposite cut away.
 |
| Lino Plate. |
Paper used was Japanese cream mid weight.