Sunday 14 April 2019

Botanical Inks :Design Journal :Foreword

                                                                              
                                                                     1

Green Issues

 In Design


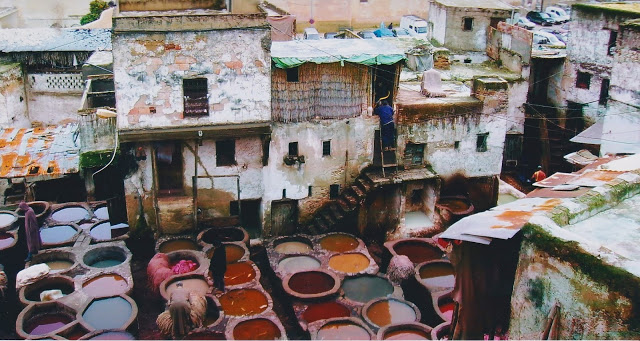
Fez, Morocco. Ancient dye baths and traditions still being carried out today


Ecology Evolution : Foreword

A brief review of Design Journal.

I have always been interested in the re-emerging systems of local manufacturers and locally sourced materials, sourcing natural plant dyes from the landscape intrigued me. I set out to research the subject of natural dying, knowing through my knitwear career the historical values of earthy colours and the natural colours syrupy plant dyes can create.
Wishing to avoid synthetic chemicals dyes and having knowledge through my grandfathers occupation as an industrial chemist dyeing fabrics for Coutaulds. While growing up he taught me how to dye from nature as a child by adding this process into my childhood play(dyeing mini hanker-chiefs for the fairies and small animals in his garden for me).My grandfather was eventually awarded for his sustainable dye practices by the WWF (world wide life foundation).

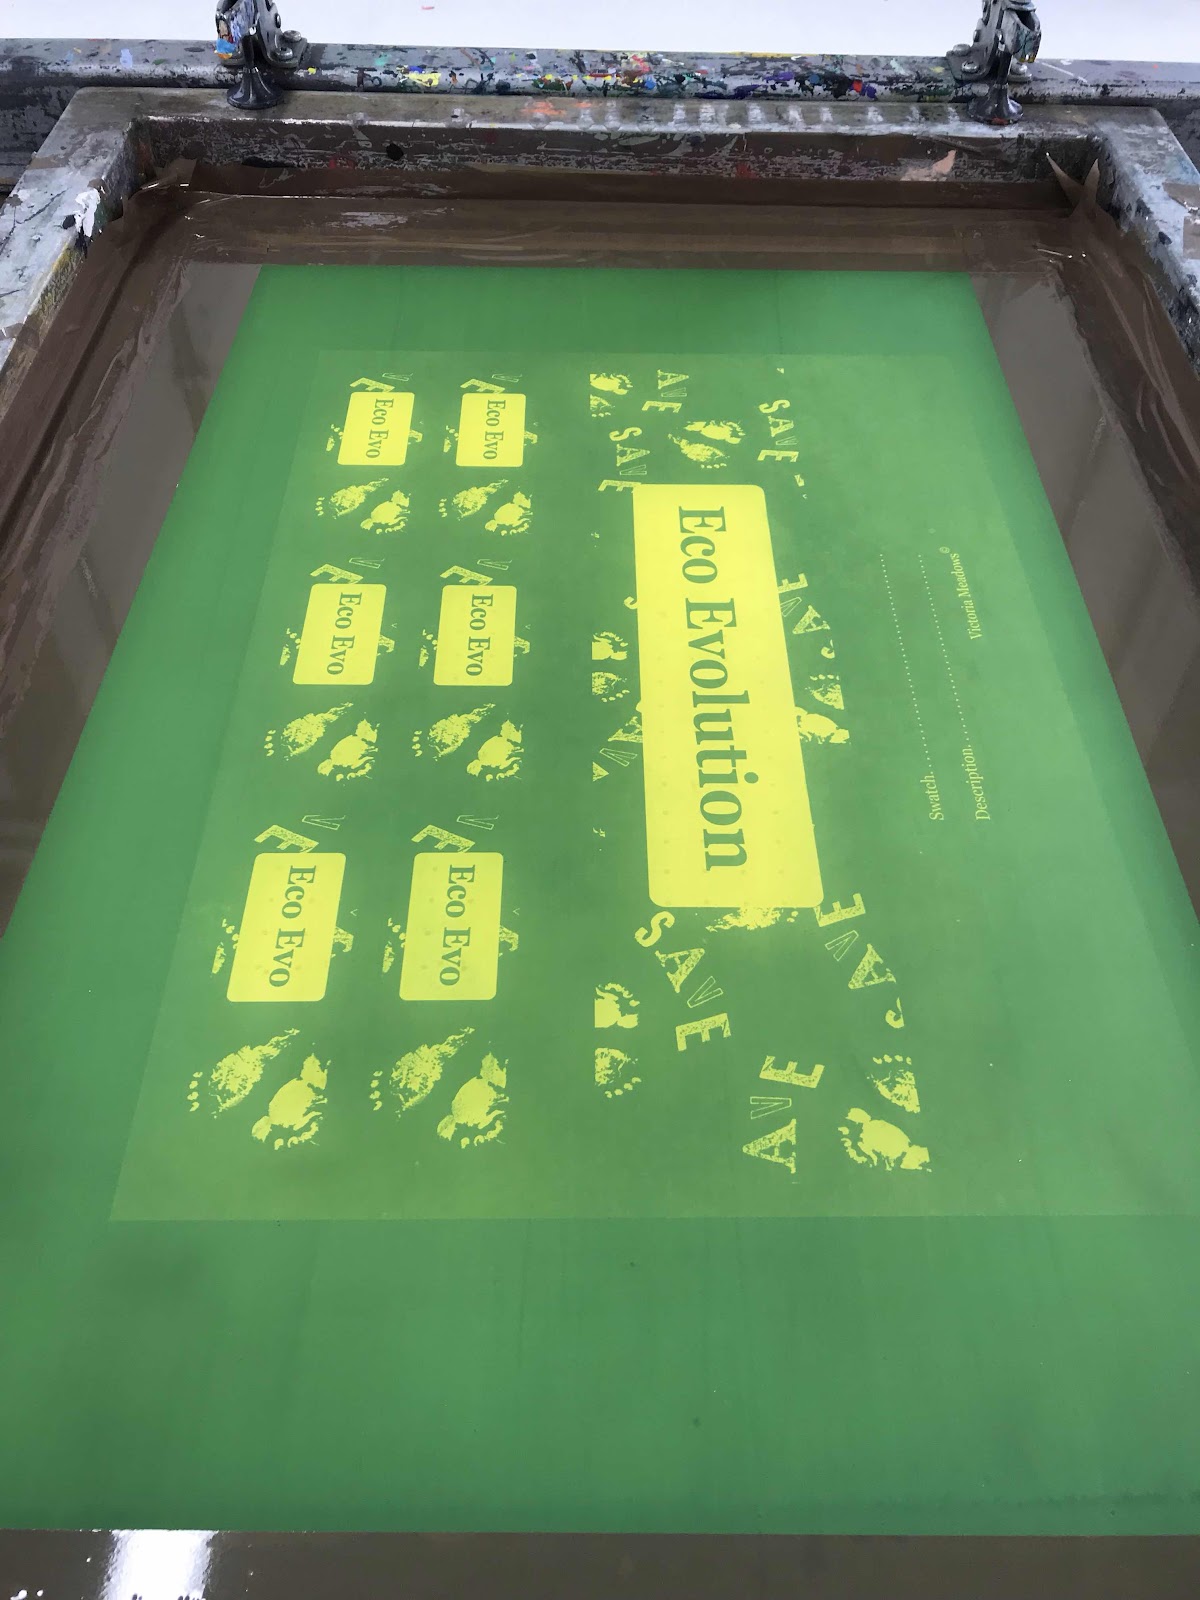
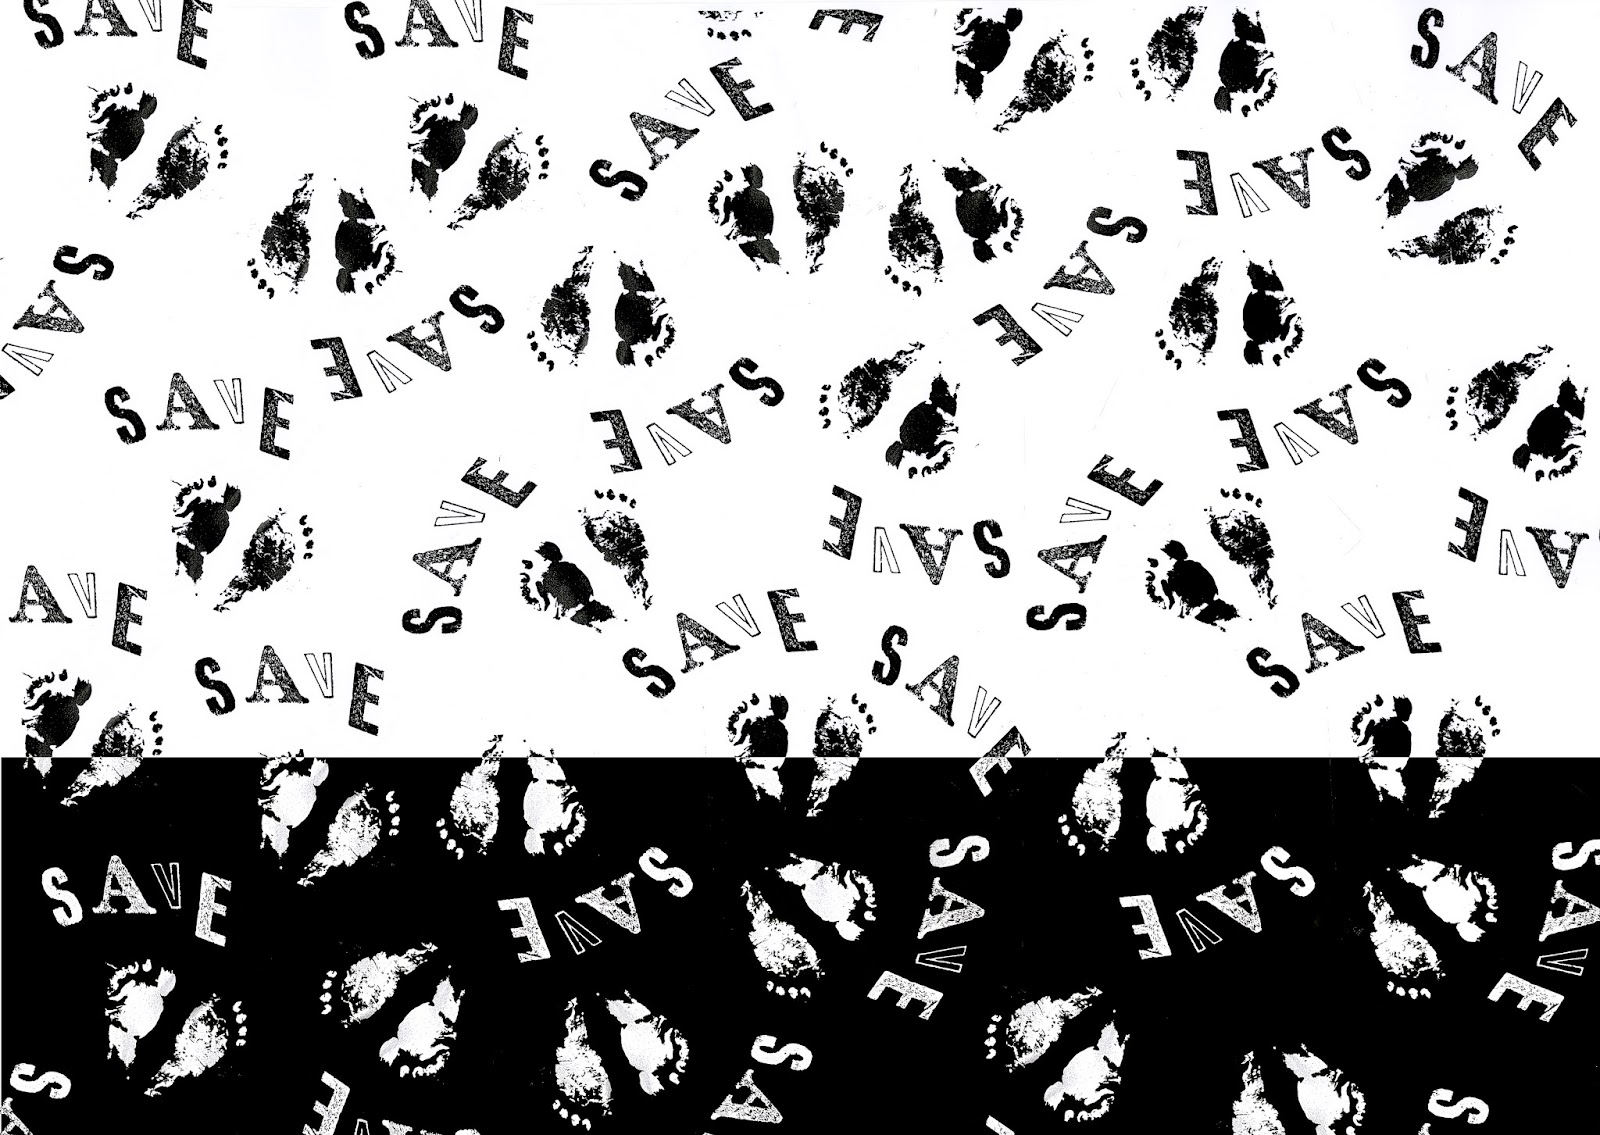
Making inks from natural materials was the main process for removing synthetic materials from my printing project and proved to be the most sustainable way to design compared to the other processes I tested within the five test projects trails within my  brief.
I set out to initially create my own dyes, then I developed my own inks for screen printing. One book that I used for most of my knowledge was botanical inks by Babs Behan, more details of my practical processes can be found on my blog ’naturesarmour.blogspot.com’
Developing my printed ink for screen printing was developed from an online makers video clip, this and my testing organic printed ink for printing can be viewed via (Appendix.V)


Drawing ink using plant pigment.

After using a dye bath for dying fabric swatches I boiled down the remaining residue in order to make a drawing ink.
I used 2 tsp of plant pigment, 2 tsp of gum Arabic , 1 tsp of vinegar and 1 tsp of salt.
Return to heat and simmer to get a thicker consistency.
writing ink developed through natural plant pigments.

My first attempt at drawing ink, it worked better with a paint brush was a bit drippy using a ink pen (traditional calligraphy pen).

Natural dyes using Hunting and Gathering technique.


Potentially dying fabrics using natural resources is a eco conscious sustainable process that has been done for centuries and centuries. Removing chemical compound dyes from the system is a good way to help the natural earth combat environmental damage.
I have started the process of creating my own dyes and solutions to create natural colours from the environment and what would potentially be wasted, can be used to create great colours.
Rhubarb leaf for mordants and dyes.
Rhubarb leafs make great mordants for animal fibres and can also be used as a colour modifier.
Chopped Rhubarb leaf for boiling.
                              Chopped Rhubarb leafs before cooking in water for 1 hour.
Rhubarb solution for mordant and dye.
Mordant solution created.
Avocado dye bath
Avocado pip dye bath boiled for 1 hour before adding fabric.
Avocado fabric swatch dye.

Fabric swatches dyes using avocado pip.

Iron Water is useful to use as a Mordant it fix’s vegetable fibre and can also brighten colour tones when dyeing fabric.
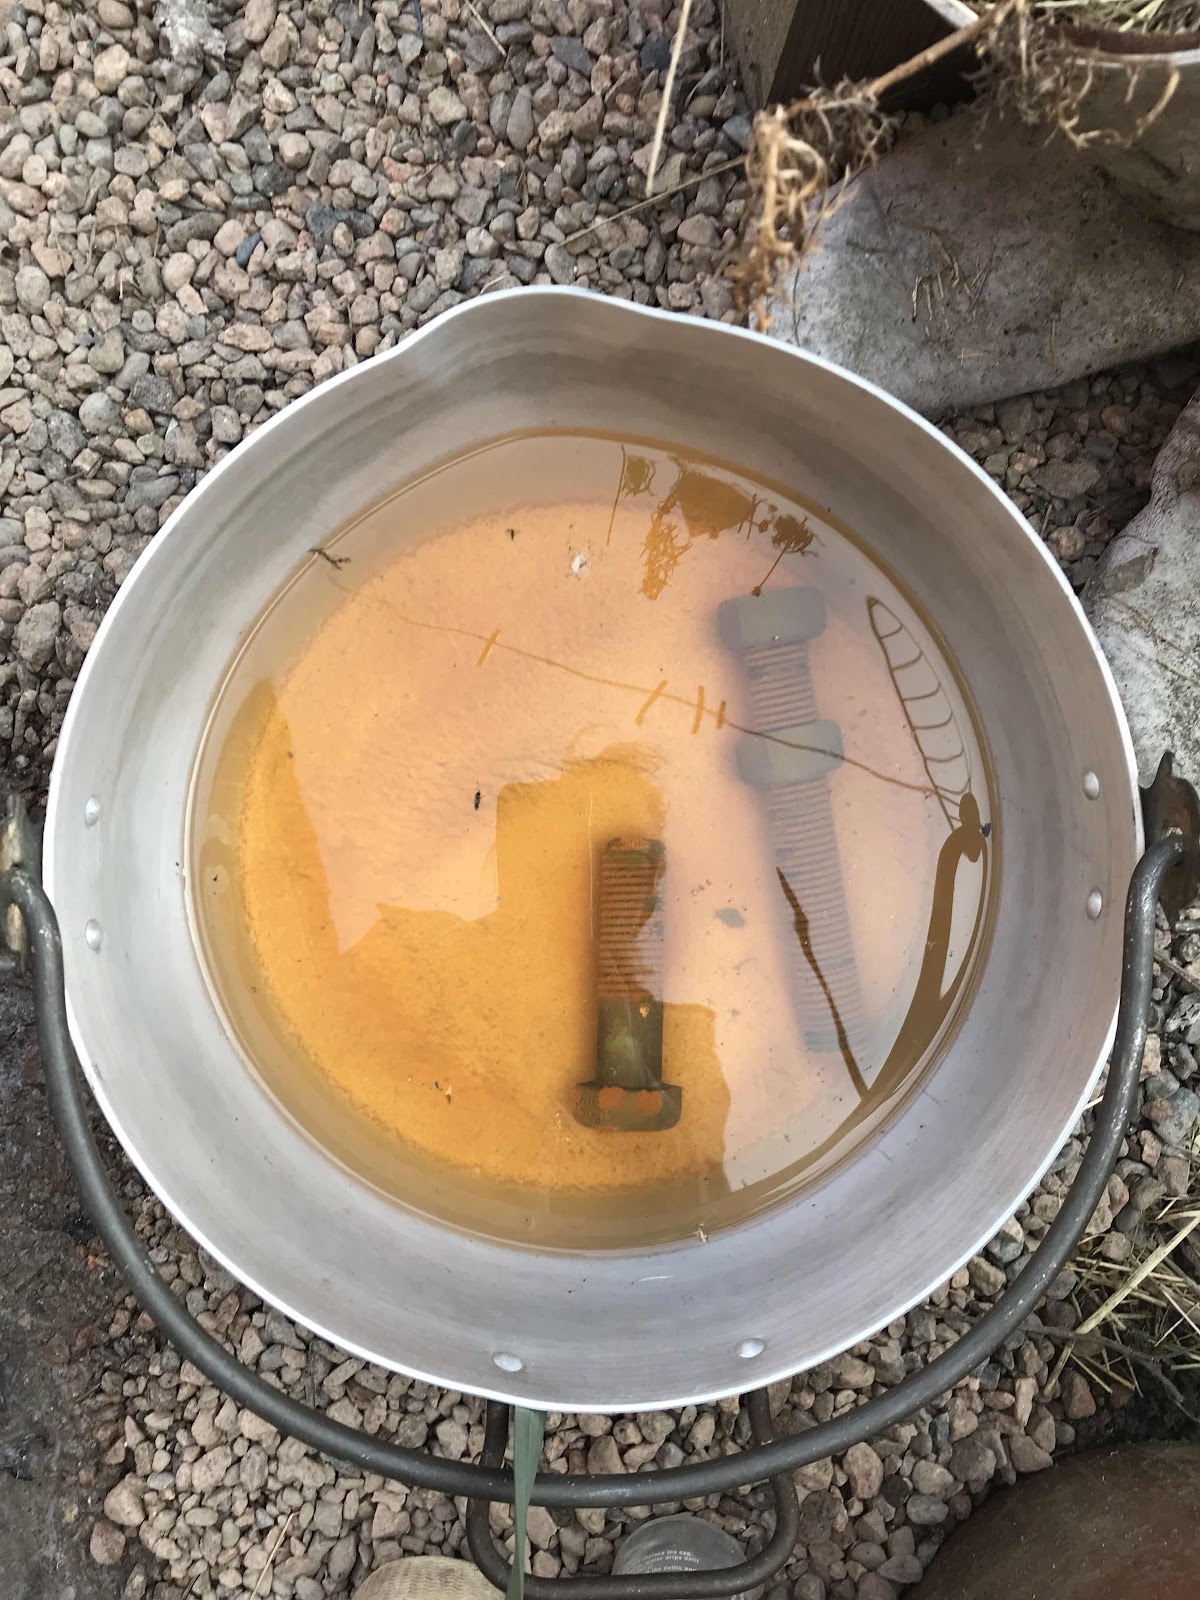
Mordant Iron water.
Old nuts and blots can create a great mordant for fabric dying.

Wild Nettle
Hunting and gathering from your local surroundings is a great way to dye your own fabrics. Try not to pull up the roots, using scissors and gloves cut 3/4 leafs down from the top.
You need 200% more than the dry weight of your fabric. I have cut 100 grams of nettle add boiling water to nettles and add up with warm water. Leave in water for 1-2 days use a suitable mordant for your fabric. 

Wild nettle chopped for boiling.
Chopped Nettle.Sock in water for 1-2 days to soak out the natural dye.

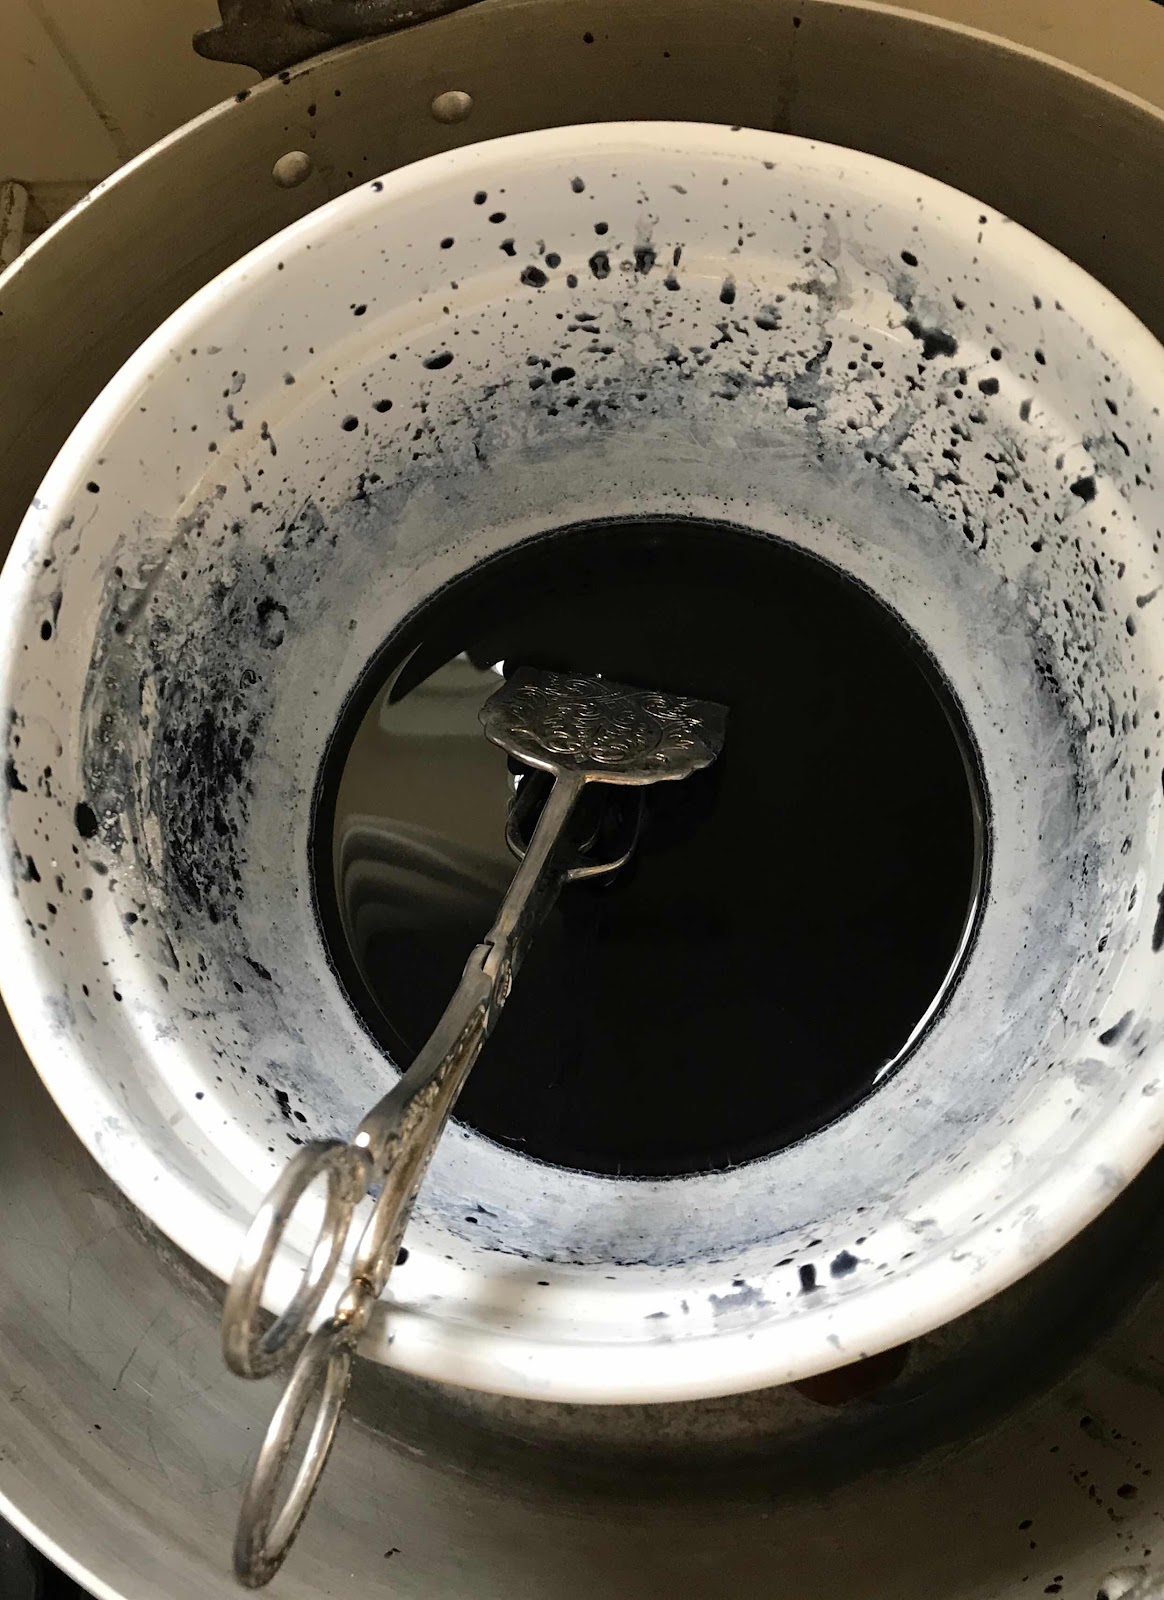
After 2 days in water, drain plant material to reveal deep green almost black dye solution.
Nettle dye solution.


 Use a Rhubarb mordant for animal fibre .
ie silk or wool.
Silk soaking in Rhubarb mordant before dying.

Cotton woven squares soaking in Rhubarb mordant, soak for a few hours of over night. Wash in Ph balanced un perfumed soap.
Blackberry dye
Using a small bag of blackberries boil in water for 1 hour, drain into a jar throw away pulp(mash berries when cooking). Add pre wetted, pre mordent fabric. Boil for 1 hour for strongest colour less for lighter colour. Use one part fabric to one part dye amount, making sure you cover fabric.
blackberry dye bath.

Hot dye bath simmer for one hour Blackberry.
Blackberry dye swatches/Cotton.
                         Dye samples in Cotton using Oakgall mordant and blackberry dye bath.
Blackberry dyed swatches on silk. Rhubarb dye silk sample on right.
Silk samples dyed in blackberry dye and one dyed in Rhubarb which is also used as a mordant.
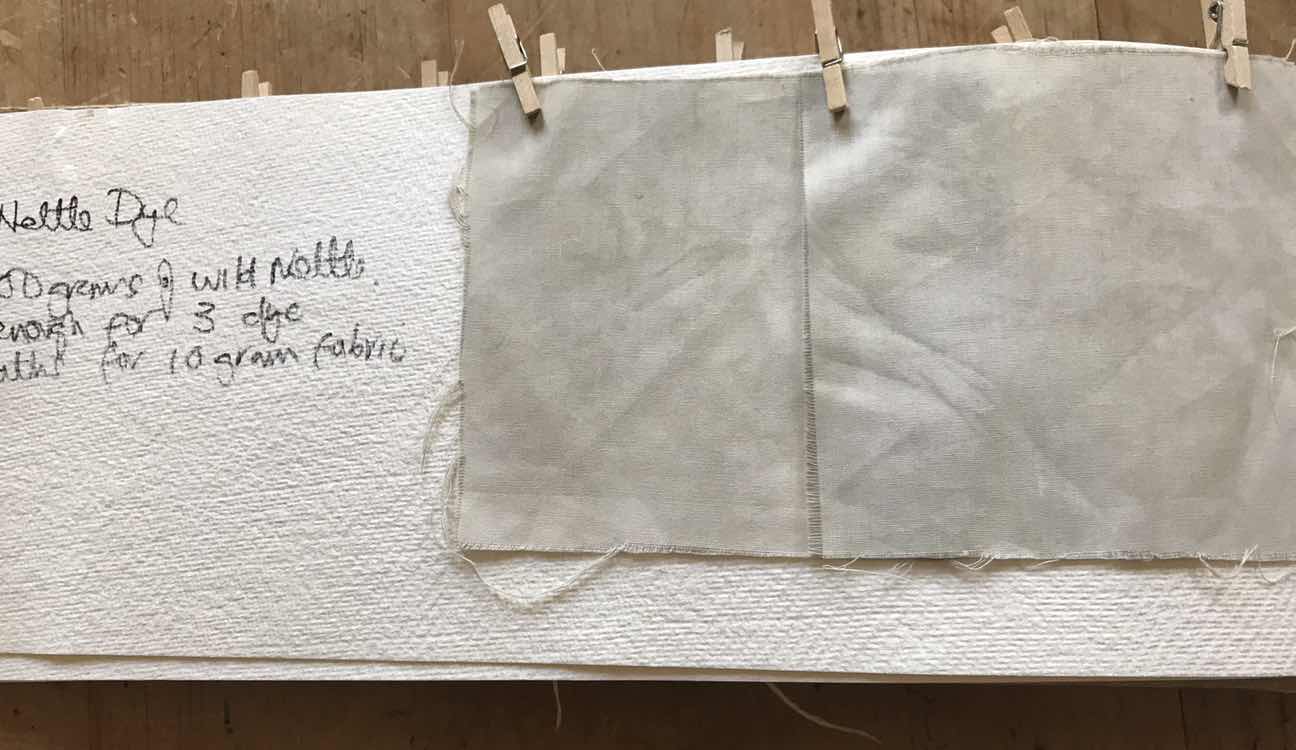
Nettle dye samples on Cotton.
Nettle dye.
Nettle dye on silk.
                           Nettle dye onto silk with Rhubarb mordant added before dye bath.
Up cycled coffee bean dyed fabrics.

Left over used coffee granules from natural coffee bean. Pre mordant oak gall on the cotton swatches on the right. Silk swatch on the left using pre mordant rhubarb leaf.
Indigo dye fabric swatches.
Woad dye bath used in ancient celt and saxon culture to dye fabrics and paint warriors faces before battles. It comes from a locally found natural forna.

Indigo dye.
Indigo vat dye is different to most dye vats as it is not soluble in water, it needs some chemistry to allow the pigment to attach to the fabric. The oxygen in the water needs to be removed using slaked lime (Calcium Hydroxide. Using gloves, goggles and mask is needed for safety reasons.)
Equipment and materials.
Equipment and ingredients needed for indigo dyeing.

Indigo dye vats take a long time to prepare. Indigo does not naturally dissolve in water. A chemical reaction is required to remove the oxygen which allows the indigo to fix to fabrics. In ancient times this was done through fermentation which took weeks to work. Indigo also does not work well when heated directly so a bam baree must be used.
preparations for dying indigo.
                                       Bam baree should be used when heating indigo.

Indigo dye bath.
I used my own version of fructose syrup as I found it difficult to purchase.The vat should go a green colour when the oxygen leaves the liquid which helps with the pigment fixing to the fabric. I think I could do with buying some fructose and doing another vat test the results.(Another name for fructose is fruit sugar)
Indigo dye swatch results.

                                                            One dip in vat results.

Indigo dye on raw silk and cotton.
3 dips in vat using silk on the left and cotton on the right. There is some blotching visible which could have something to do with my version of fructose. The vat should have gone a green colour and it didn’t. The answer is to do another dye bath using proper fruit sugar.


Thursday 4 April 2019

Green Issues In Design :Contents Page


 Ecology Evolution:    


1.Botanical Inks:Design Journal :Foreward


2.Acknowledgements 


3.Abstract


4.Introduction


5.Overview


6.Chapter I: Green Issues in Design


7.Chapter II: Design Developments


8.Chapter III :The Future


9Appendix I:Marketing Green Issues


10.Appendix II: Brief outline of MA Project


11.Appendix III: Transcript Ten Billion


12. Appendix IV: Patagonia Inc 


13.Appendix V: Organic Ink Developments


14. Appendix VI: Fixing Fashion Sustainability


15.Appendix VII: Eco Friendly Alternatives


16.Appendix VIII: In depth report on plastic waste


17.Appendix IX: History of Conservation and Marine Plastic Pollution.


18. Appendix X: Carbon footprint survey on different types of carrier bags.


19. Appendix XI: Sebastian Copland


20. Appendix XII: Anthropocene: The Human Epoch


21. Appendix XIII:Visual Research through Pinterest


22.Appendix XIV:What motivates consumers to make ethically conscious decisions


23.Appendix XV:Future of Green Design Research


24Appendix XVI: Correspondence through organisations /questionnaires


25.Appendix XVII:Future emerging design innovations 


26.Appendix :XVIII:David Attenborough at Parliament House


Sunday 31 March 2019

Marketing Green Issues:Foreword

Ecology Evolution: Foreward
Marketing Green Issues.

The reasoning behind this book has come from a comprehensive journal documenting a project brief of which includes some of the Ecology Evolution deliveriables for a Masters Degree in Design at University Lincoln 2019.

Extracts from my Design Journal.

Marketing ideas and current debates to encourage consumers to and viewers to seek a deeper understanding of ecology issues is part of the objective of my designing. These new and emerging strategies debates and current issues can be part of visual information on products including Wall Murals, fabrics, wall papers, tote bags and T shirts.

Hand Printed letters using old metal printing press alphabet.
The objective is to give social impact in order to make my work relevant to social needs, recognising global warming and more specifically keeping our oceans clean through conservation campaign strategies within my practical work. Connecting with a number of nongovernmental groups to encourage a deeper meaning of social change through global knowledge of various campaigns including Antarctica Ocean Sanctuary currently run by Greenpeace.

 Greenpeace is an environmental campaign organisation that is currently campaigning to prevent plastic pollution across our oceans, reducing plastic use via consumers is one way of doing this.

The Digital Revolution 
"The digital revolution and it's subsequent technologies have transformed the fashion designers work.Together they form a whole new dimension from within which to create. In particular Adobe's Photoshop and illustrator programs have placed in their hands the tools they needed to bring textile design, traditionally a separate discipline, into their own studios." (Doe.T.2013.12). Collaboration between disciplines is a key advancement in design development and so is the creative collaboration between traditional and contemporary as "Philip Delamore, director of The Fashion Digital Studio based at \London College of Fashion. As a practicing textile designer he has experienced the entire digital print revolution."Early on, I was working on digital prints as a consultant for designers.I would often have to un-digitize them- try to achieve a screen print look with the technique-because digital print was regarded as inferior and that wasn't what designers were looking for.The full blown digital aesthetics look to a long time to develop." (Doe.T.2013.12.)
Integrating  traditional and  digital textiles bridges a gap between industrial visions and traditional crafts. " One of the main issues of design is its use and how it is respected cultivated and progressed through time(product use and usability). In late industrial capitalism, designed, artifacts and the experience of them are sites through which people , to different degrees, live facets of their lives. People live and dream through design. Designed artifacts are, in this sense, materialized ideologies”(Laurel.2003.26).
As Dalke points out "Interdisciplinary is not a place to be reached but rather a commitment to a process of continually testing the value parts, experimenting with different ways they might be combined to make wholes, and using the resulting wholes to refigure the parts"(Dalke et el 2006:7).

Within my dissemination I can see links from my multi faceted project with my numerous test projects that a desire to collaborate different techniques not only to evaluate which is the most eco friendly but also to acknowledge and understand the attributes of each process within one collection in order to add interest  and uniqueness . I have learnt from my project 'Ecology Evolution' is how important the journey through researching visual imagery and theory  is as important and even more so than the actual completed achieved designs. The end products I have created linked intruitivily to the 'why',that is the desire to improve the ecology of the world through knowledge distrubution andd serve as examples of how design can inheret value and meaning for a broader subject.

"Liberty has been at the for front of commercial and art textile printing since the late nineteenth century. During that time it has collaborated with many designers, from Bill Blass to Vivienne Westwood. Emma Mawston, head designer at Liberty fabrics, beleves there is a place for a variety of techniques, so long as they are treated with equally high standards in terms of print mark and colour matching, as well as design. "I think digital printing and screen printing work wonderfully together in a collection enabling different effects and designs to be created. There are colours and tints that are not able to be created digitally only with screen printing and obviously vice versa" (Doe.T.2013.15)

Extract from Ecology Evolution Design Journal.

Image on forward pages we're created on photoshop using a basic effects button. This may well be useful for screen printing imagery on to paper and fabric.

  Adding text to explain damage via plastic pollution, lettering could be bolder using different text would work better.


Photograph taken while flying across Europe.

Whale tail fabric full width plus repeated for fabric roll production.
Repeat pattern width of fabric standard 140 cms wide 200m long ideal for fabric curtains or wall paper. I have also created a number of different scales for wall paper, Muriel and also silk scarf repeat and velvet repeat for interior fabric.
 These fabrics were produced digitally through research within my dissemination I have realised even though currently Memaki digital fabric printers don't use eco conscious inks>However they use less ink than traditional print making " One factor that my determine where printing develops more generally is its environmental footprint. The digital printing process uses half the ink of screen printing methods and results in less waste being discharged.There is also no washing of screens or changing colours, so water consumption is reduced by almost half"(Doe.T.2013.13) The down side is the obsoleting aspect of machinery, new digital machines are constantly being designed for the industry , it isn't unusual for fabric companies to replace their machines every year. I am assuming their old machines would be sold off to other companies to reduce the impact on global waste.Otherwise an awful lot of machine waste finding itself in landfil and possibly inappropriate dumped in areas of the world, polluting our natural world.

Scale developments
I have chosen small repeat fabric scaled down 75% of original repeat for wall paper. I have chosen largest repeat for back velvet for cushions which has the text ’save’and the whale tail in the repeat as a large image single motif.

Digital printing onto silk.
This is the repeat whale tail repeat for the scarf in thin silk, the medium silk has run out which I wanted initially, however the thin is really floaty and light so either would have been good anyway. The repeat needs work as one side has a fatter element and when it is multi repeated it shows up as a block. This will be sorted out before finished print off. The velvet also needs washing twice and it needs to be dried naturally. I will be using my spin dryer to squeeze out any water and then a radiator to dry.


Velvet repeat whale tail.
Digital printing onto velvet.
Silk scarf fabric repeat whale tail.Using Memaki fabric printer. The printing of fabric using digital machines can for some feel a lack of spirt and individualism as described in the book Textile design in the digital age " Many devotees of traditional printing methods maintain that digital printing lacks the spirit and individuality of the more human processes. It can also miss the sincerity of print that has taken many stages to create. By way of response, designers have been enriching their digital prints with embellishment detailing and over printing." (Doe.T(2013.13).


Screen printing using photoshop.
This is the header card for my fabrics so they are displayed well as I am not submitting anything made up accept for a tote bag ,in order to try and reduce plastic use for the consumer to prevent climate change and to keep our seas and our Antarctica save. The repeat pattern of printed baby feet which are my daughter feet printed originally in black white colour are added to photoshop with the save text which has been printed with old cast lettering from an old printing press.Put into photoshop to the scale I wanted and then added to a screen for paper which is different coarse of mesh  then for fabric printing. This was created initially onto a word doc for the Eco Evolution lettering and added to photoshop, it will also be paper packaging for tote bag and wall paper. If I have time I will create a swing ticket as well.
Section from one of my sketch books.
Developments to add to screen headers for fabric swatches and swing tickets and also wrapping packaging.
Screen for printing paper card headers for fabric swatches.
Screen print for paper and card. Using a number of colours white/cream, indigo on cream, linen/ cream,black/white,linen/ white.
Mixing colour inks for screen printing.
Linen colour/putty printing ink.
Created a really nice putty and deep navy for headers and swing tickets. Using up cycled newspaper print paper for packaging.

Printed paper with header and swing tickets.
Printed swings and header card for fabric ready for splicing. I have decided to create a eco ink swing in leather that I am up cycling from a leather sample book. I will be using the laser cutter.

Friday 29 March 2019

Printing onto Fabric

Screen Printing Traditional Method.   Linning for tote bag with whale Lino print has been created via Photoshop uploading an image that I created off a hand made print I created via old printing alphabet pieces used on old printers for newspapers with a printing of my daughters baby feet that was done using black water colour. I have changed the background by reversing colurway for the bottom of the tote which can become dirty of time.Making the background dark will help keep the tote looking clearer for longer. I am pleased with the indigo navy onto linen, it’s a colour way and fabric choice I have used previously and it’s more or less fail proof, classic and contemporary at the same time. Below is a traditional screen print onto Linen/single colour print.
 
I choice to cut and paste this design to get a random repeat using a collage effect.


Linen is more difficult to print, I over printed due to an area at the bottom of the screen not printing. Next time I need more ink generally on the screen.

Creating my own inks.
I have bought all my ingredients for making my own screen printing inks and also block printing ink for Lino printing. I will be testing on a small screen using an image of a whale. I need consistency in order to analyse correctly. At the moment for my design work for presentation ie MA unit I will be making my samples in inks used in University Lincoln print room. The reason for this is numerous, firstly developing inks is something that takes a lot of time and also the screen used in the print room are very expensive in accurate printing ink can damage them. Therefore I am buying a small screen for this job.


 Photo shop fabric random repeat with a reverse section to go at the bottom of Tote bag/ shopper bag to give it longevity.
Original pattern repeat before reverse panel.


Thursday 7 February 2019

Testing New Wood cutting tools

New Protect Antarctica Lino Print

I developed my Lino print over the past number of weeks while developing other elements of my project creating different dyes onto fabric which I can develop into inks and pigments for Lino inks and screen printing inks.
The colours I am developing are indigo and woad for my Tote bag for shopping to reduce single use plastics.

Lino cut onto A3 using 3 different tools.

I initially draw onto baking crease proof paper so I can turn it around and trace the opposite onto lino. I have also recognised it is useful to rub the lino with a rubber to remove crease that has got onto lino from its making process or your hands. This makes pencil easier to apply. I also use a really thick soft pencil which works really well.

The large one is used for big areas and the smaller ones for detail.

I have chosen to create a new screen print as the finish that you get from a screen print is more defined and more conformed than using the press and a lino, its also commercially quicker and therefore cheaper to make.


I have developed some more Lino prints using coral and seaweed as inspiration. These have been developed from botanical illustrations which I have sourced through Pinterest research.
I think that the tools I have used and my developing skills have increased the element of detail which previously I found difficult to develop using the cheaper tools.


Tools used for cutting link. Big for large areas is useful as it makes the process quicker.


Traditional Lino plate with hessian back.

This Lino plate is harder than the softer Lino that I have been using, I actually really like the colour it’s far more neutral and easier on the eye. It slips a bit more when using tools, however it’s harder so it doesn’t run as far when cutting. I will be printing this plate this week. I traced out my drawing onto plate using inked paper. 


Lino plate initial drawing and the cutting line around it.

Completed Lino cut.

Lino and historical illustrated plate which inspired my Lino cut.
After printing I have realized that the previous lino that I have used the ink rolls onto it easier also the plate after printing it curved and wouldn't lie flat.I could see this as a problem moving forward so I will be using the original  lino that I have been using. The actual print design didn't go to plan, the lettering is difficult to read and the seaweed is to close to the feet. I may use this image on illustrator within a collage print.


Colour blending using printing inks Cranfield :California safe wash relief inks,oil based and washable. Prussian blue/Progress blue/Opaque white.


Clam Cross Hatch lino prints in neutral colours using sketch book ideas for reference. Since purchasing new tools for wood cuts/Lino cuts I have discovered how much better the tools are, however for more care is needed as they are extremely sharp.
I would like to put this lino print into Photoshop and create a repeat pattern.
Mixing ink with palette Knife.
Series of colours for fabric range.
These are the inks colours I used to create these colours mixing with a lot of white. I am hoping to make my own lino inks using an ancient Japanese recipe.

I will be adding natural pigments to create my colours, hopefully creating similar colours than what I am using now
Medium soft roller.
Duck Egg Green


Petrol tone a great neutral colour even though dark.

The roller size medium soft roller head.

I have added a strip panel in the design, the opposite cut away.
Lino Plate.
Mixing the colours took quite a long time I added thinner to this but not too much. After getting the right tone I added a lot more white.
Paper used was Japanese cream mid weight.

Tuesday 5 February 2019

Up cycled Old Pennies for Tote Bag Design

Clamp used to hold pennies in when drilling

Drilled pennies and the drill bit that was used.

Piller Drill with cut out switch behind for emergencies.


Detail for Tote Bag.


Old Pennies that I have kept since a child have a visual equality that links to previous times and can give an nostalgia and an awareness of recycling, up cycling theme to my Tote Bag Design. I am designing a Tote Bag to reduce single use plastics as part of my MA Design project. 
Old pennies without drill holes

Method of Application.

I have chosen to drill a hole in my pennies using a drill. Firstly a used a punch hole tool to make a small v shape into the penny. This helps the drill from moving around. For this task,it is important to put the pennies in a vise and make sure when drilling it is placed over the gap so that the drill has room to go through the penny and doesn’t continue to drill through the vise.
Technique to use when drilling is to drill a bit then ease of drill a bit and ease of making sure you hold the vise securely and don’t let the drill bit to move around.

The drill opposite is a Piller Drill used for various making techniques.
I have chosen it as the easiest way to drill holes in pennies.I needed to wear protected goggles also I wore overalls took anything that could have got stuck or dragged into machine i.e  clothing .
Queen Victoria on a penny from the turn of the century.
Clamp that secured the pennies in place, make sure they are secure otherwise the penny will run up the drill bit.
The Piller drill and drill bit used to drill pennies.
Drilled pennies with image of drill bit used.

Penny with jump ring, this is just a ring I found in the makers lab. I will order a slightly larger ring about 7mm in rose gold. I will attach the penny to the tote bag with crocheted rope or leather shoe lace.


Finished detailing for tote bag to encourage upcycling.

These pennies and also the pom poms that are to be attached to bags need to be soldered as the metal loops are coming apart.

Brief over view of project

Poster for MA Show The Poster used for the end of project show at University Lincoln. MA studio in Design end of Degree Show June 20...